About Me

My photo
I created this blog to post my photography work for my A-level course.

Sunday, 18 January 2015

Emulsion transfers // Experimental

Emulsion transfers are a type of experimental photography in which we learned in lesson. This resulted in printing some images and photocopying them into black and white, to get this black powder that is needed to do emulsion transfers. Then you needed another surface, we used another piece of paper, to paint a thin layer of emulsion paint on and then place your monochrome image down on top of the wet paint face down. After which you had to smooth down and leave to dry. Once dried, you dip your fingers in water and start rubbing the surface of the paper off.

This is an interesting effect as it can be used on surfaces to personalise them. Each surface uses the same technique, it's just a different place of going about it.

Beneath are the emulsion transfers that I tried in lesson using images of Eleanor Calder that I found on google and quite liked.


Later that day, I photocopied each image so that I could try some hands on effects on them. The images of these are beneath.
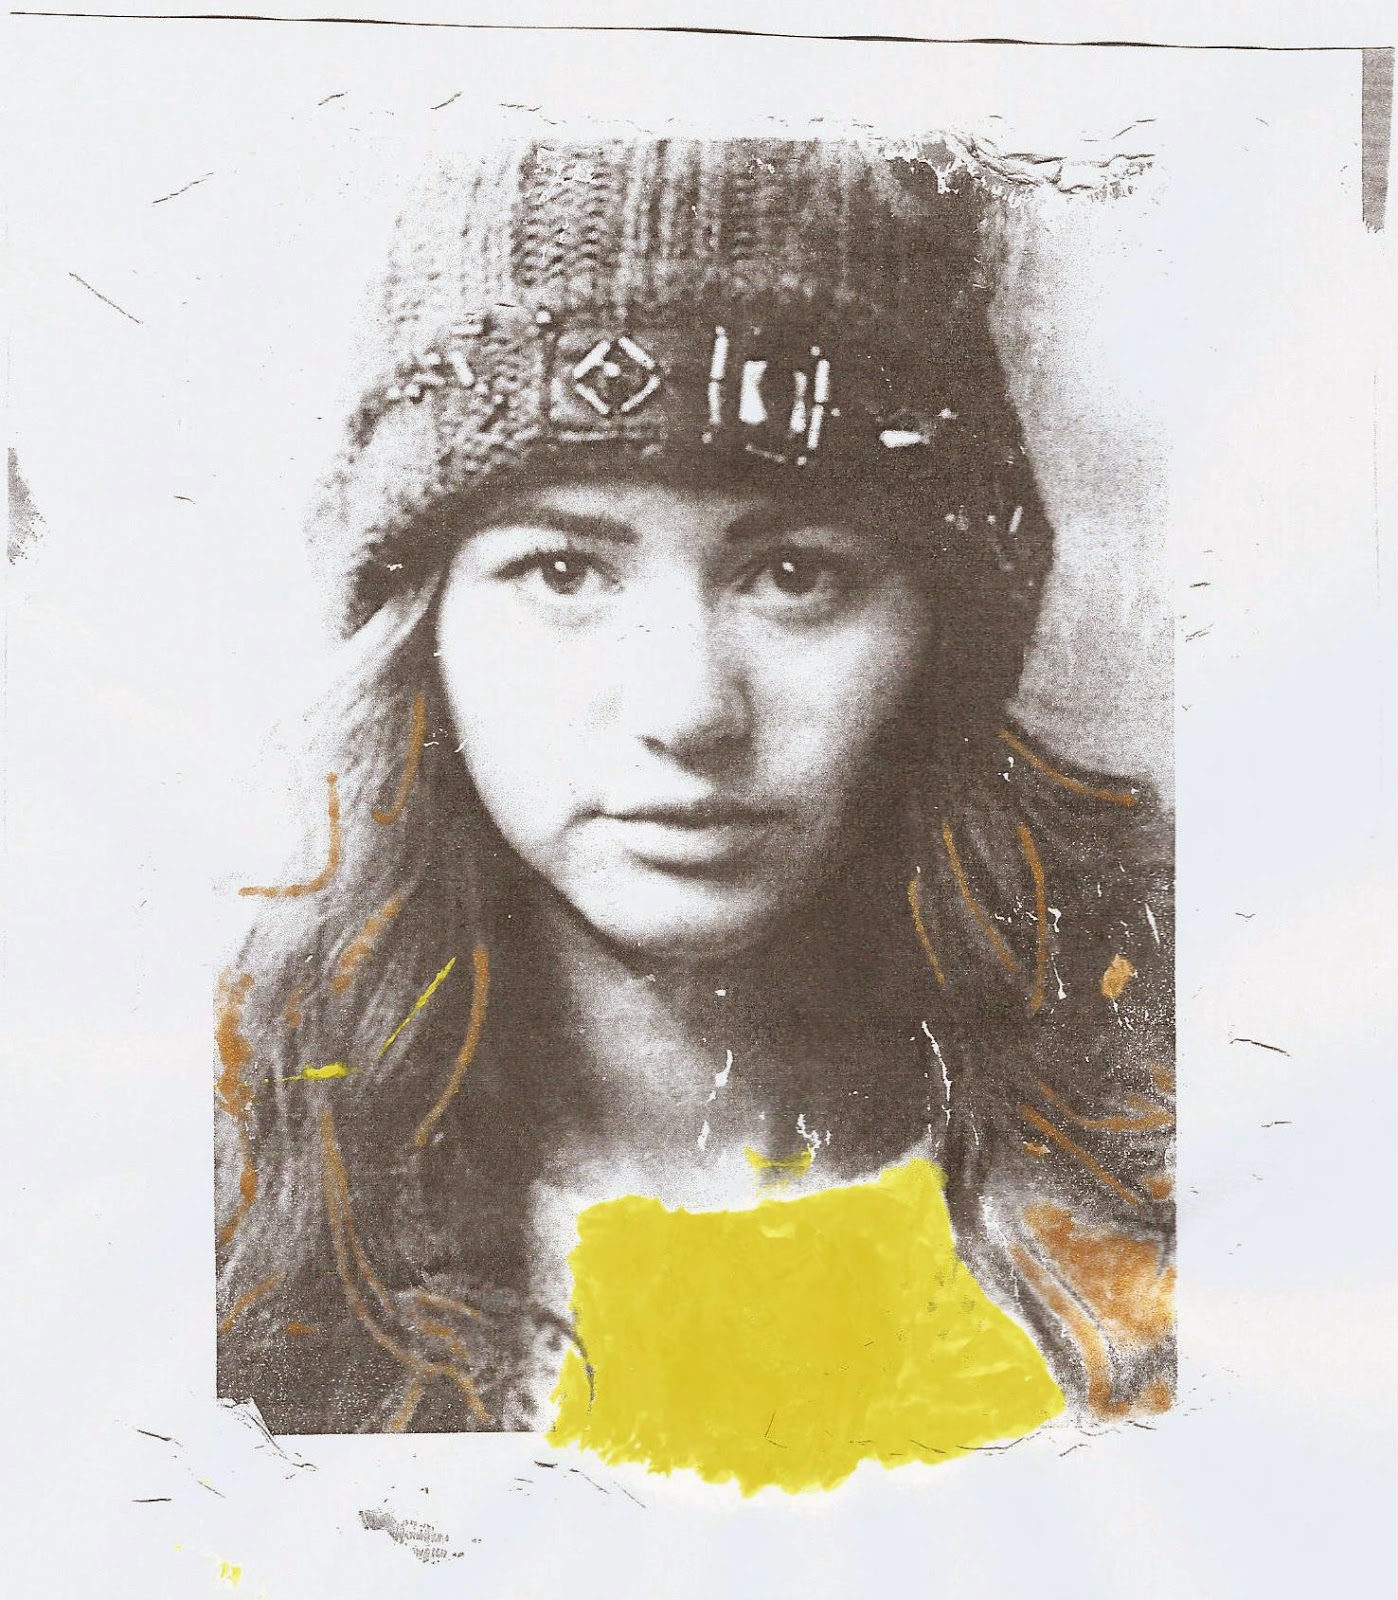
I photocopied this image twice, as the image above, I did first and wasn't too fond of the yellow that I painted her top and the other streaks of yellow (which just so happened by cutting holes in tracing paper and painting over them, as well as trying to see whether paint would go through tracing paper onto the paper like pencil marks). But I liked what I did with the bronze paint on her hair, so I wanted to create another image in which I just did this as I felt as that would look much better. 

Therefore the image beneath has just had bronze paint used to accentuate her hair that's not within her hat. This I feel looks much better than the image above because its simple and not too bright.

 The image above has been originally taken within greenery outside, as the original image is below. The image has been painted green to convey the greenery within the original image. Also her hair has been painted a bronze colour again to accentuate the way it falls within the image and her natural colour as seen beneath in the original image. 
(original image for above)

Saturday, 17 January 2015

Pierre Cordier chemigrams inspiration // Experimental

Pierre Cordier, the first person to make a chemigram, as well as the inventor and innovator for the chemigram. These are quite interesting as chemigrams are images that have had substances or as the name suggests, chemicals on the photographic paper as the light is going through the enlarger onto the paper. These substances on the paper obstruct light from reaching the paper ranging from slightly to entirely. Therefore this adds an effect to the image. Once the enlarger has transmitted the light onto the paper, you wash the paper in water to remove the substances from it. Also the stop is replaced by water to do the same job.


I created my own chemigrams in the darkroom using different substances to create different effects.

 image above has had cream cleaner used on the paper to create that effect.
 image above has had coconut butter used on it to create this effect
 the image above has had flour on the top and tealeaves at the bottom to create this effect
the effect on the image above was created by spraying hairspray on the photographic paper.
the image above has had flour placed along the left hand side to create the effect there.

I also added chemigrams to paper whilst enlarging negatives onto the paper, I have posted a few beneath.

 the image above has had squirty mayonnaise drawn across the image with a negative from a previous experiment printed on the paper.
 the image above has had cream cleaner placed on the photographic paper, with a negative from a previous experiment.
The image above has Vaseline drawn across it in three streaks, with an image that I took so I would have negatives to use and play around with in this project

Thursday, 15 January 2015

A Day In The Life // Experimental

Before the Christmas holidays, we got told by our teacher to take images to represent what we did for a day. I chose to do this of a day that I went to London to meet up with my friend, Lizzie from Bedfordshire. In which we went to Covent Garden, Hyde Park and Oxford Street.

The images below are the images from what I did during the day of the 22nd December, including an image of all the Topshop Photobooth images that we went and did. I took images of the view I had of Winter Wonderland in Hyde Park whilst I was sat on the ground there for a few hours (I even included the 'selfie' that I randomly took).

There is a lot of images of Lizzie because I wanted to get some images of her that I could use for my media project, but after which I have realised that my images for my media coursework have to be done against a white studio background, therefore these aren't likely on being used for what my original intention was.

But overall, I believe these images give a good overview as to what I did that day and where we went. I feel as if I caught the aspect of Christmas around London with all the lights and decorations hanging over Oxford Street.


Saturday, 3 January 2015

Two negatives cut and stuck together // Experimental


 Tuesday's lesson a few weeks ago, we went in the dark room. Whilst we were in there we cut up two negatives and stuck them together to create a new, unique, interesting image. By doing this we were trying a new way of constructing experimental images for the experimental photography project.

 The image below is the tester image I had to do to check how much time the light needed to be on for the image to come out as well as possible. I went up in 5 second bursts. With this, the top of the image has had more time under the light of the enlarger than the bottom. You can see horizontal lines going across the image from where each segment got split up to get different amounts of light.

 The image below, we did with a 30 second burst under the light of the enlarger.

 The image below, I painted the developer on the image along the top and let it drip down and also flicked some developer onto the image. I think this looks pretty cool, as there are lines and splats of where you can see the image as the image only comes through where the developer has been.

 The image below, is of the same negative, but I solarised it. Therefore there are no whites, but the image is now made up of blacks and greys. To do this I had to have exposed the paper to the light of the enlarger for the same amount of time as the others, then place it in the developer for 10 seconds, after which I had to take it out and expose it to the light of my phone's torch in the far corner of the room, then put it back in the developer to finish developing and go through the stop, fix, and wash normally.

 Overall I am really happy with how these have turned out as I tried out a few different experimental techniques such as cutting two negative in half and sticking them together to create a totally new image, dripping developer down the photographic paper to expose parts of the image, and solarising an image.

Peter Hoffman research // Experimental


The images below by Peter Hoffman are from his Fox River Derivatives series, which have all been manipulated to create a very experimental effect to them. Hoffman has done this by manipulating the images with gasoline, fire and water. This is interesting as he has used substances that every living thing needs to survive as gasoline is a type gas, water and fire are all substances that keep us and everything around us alive and without them, there wouldn't be any living things.


This is an interesting thing to use to manipulate an image with, as most people usually use oil based products to manipulate their image with. Whereas Hoffman has used resources that are critical to life to manipulate his images along Fox River